Showing posts with label projects. Show all posts

Thursday, September 15, 2011

progress

remember this cart? (blogged about here and here) the one that i refer to as my pride and joy:

we have decided for our apartment to use it as an entertainment center/shelving in our living room.  but the problem was that my precious cart did not have shelves.  originally we were planning on just buying cheap plywood and having it cut to size to use as makeshift shelving.  it didn't sound great aesthetically but we didn't really want to put money into a temporary fix. 

anyway, when we were at home depot, the plywood sizes were just not going to work out right and it was actually going to be kinda pricey (and not look very good).  

plan b. we walked past these big 2"x10"x16' boards that were quite pretty and really sturdy. they were cheaper than plywood and long enough that we could get 3 lengths out of them. so we ended up getting 2 of the boards ($10 each) and they cut them for us for free.  here was our basic idea:
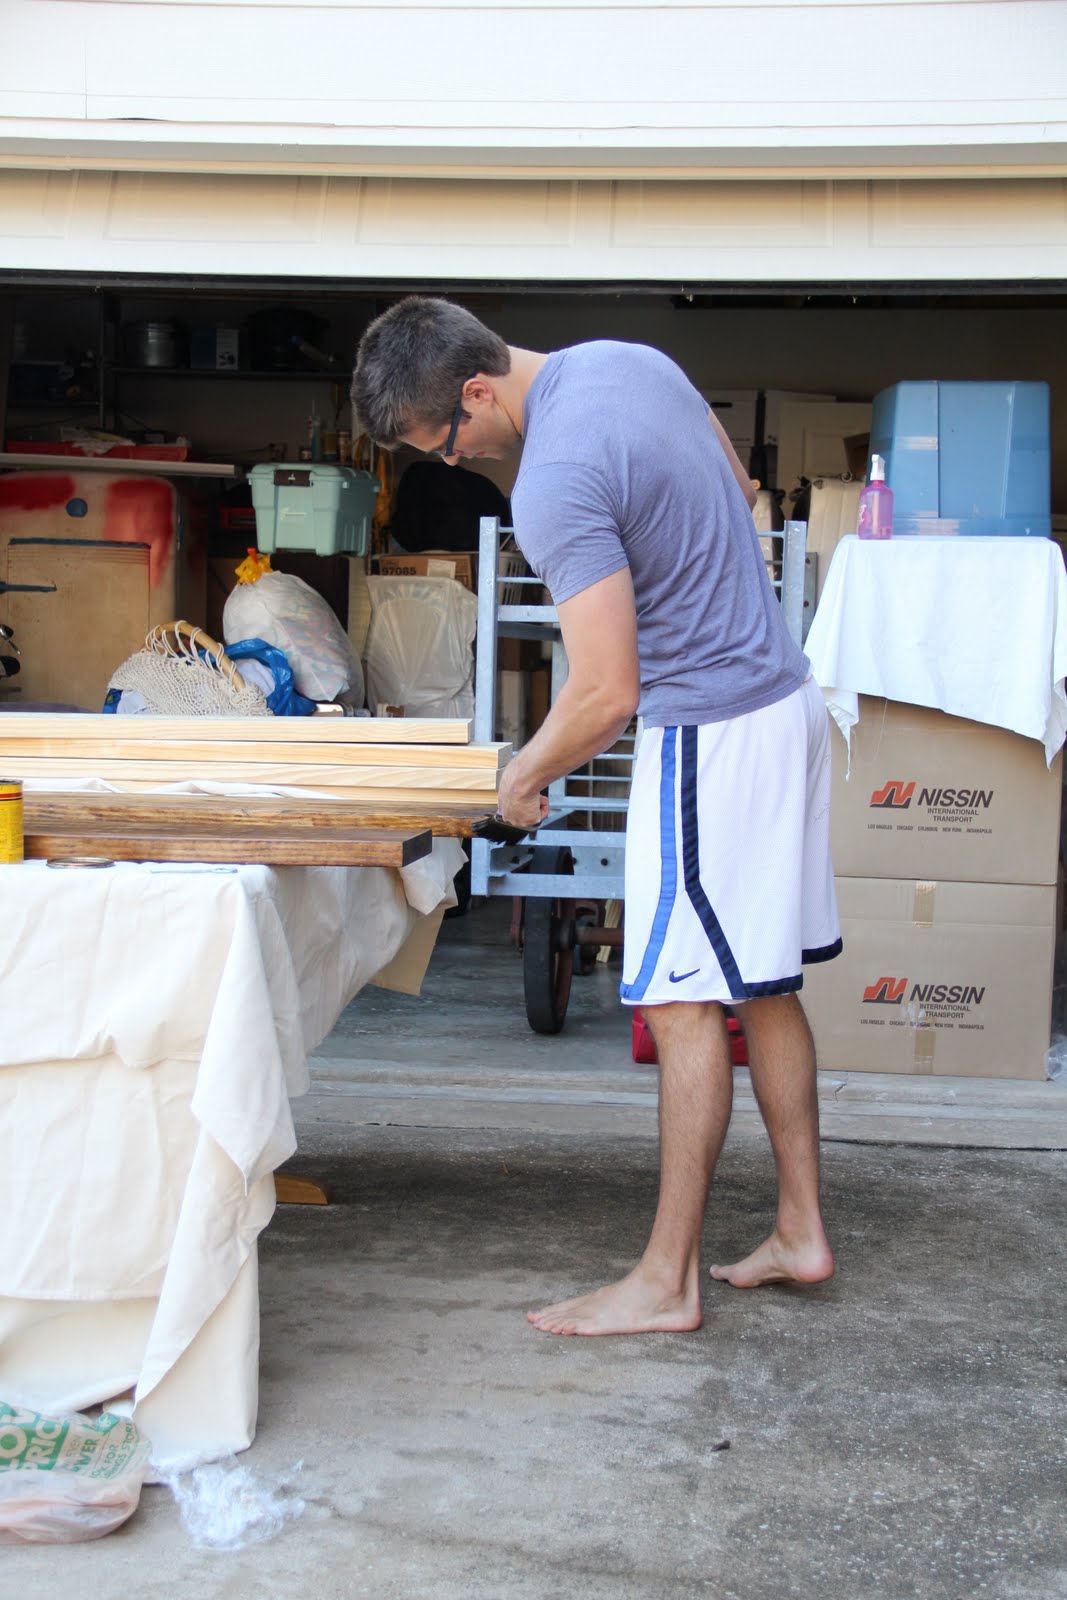
the mister and i tag-teamed it. 
i did the sanding
 
we sampled our stain options.....and decided on "provincial".
before and after the staining
and he did the staining. 
a few hours later.....we are proud. 
of course i will have to get better pictures of it when it is actually in our home (and i've figured out storage solutions....yikes. this thing is so big we need to get a lot of storage out of it for all the square footage it is taking up! ha ha)

andrew was sweet and supportive when i wanted to buy the cart. it was kinda an irresponsible buy, for many reasons:

1. it wasn't in the budget
2. we were living with my parents. so it sat in the front yard for a year.
3. it is huge.
4. we were moving to texas and it had to make the move with us.
5. it was impulsive
6. the real use i wanted to buy it for (kitchen island) will not be realistic until we own a home. with a large kitchen. that could be years....
7. it is an acquired taste for some (not everyone understands putting an industrial cart in the living room).

but regardless of all of these things, we bought it.  he thought it was cool but not spend-money-on-and-keep-in-the-front-yard cool. but he let me do it.  

now even he is telling me how great it will look in our apartment. the simple shelves really dress it up. although he still teases me ("i think we need to sell this....") he is on board. it is so nice to have a supportive husband and it was fun to work together on it.

Friday, June 3, 2011

a makeover so small its more of a "look what i found" post

a few weeks ago i found this wooden shoe form at the thrift store for $1.  i thought it was so funny that the previous owner had tied a ribbon and hot-glued fake flowers to it. i think the picture actually flatters this handiwork, it doesn't look all that bad here.  but trust me, it meant to be cute...it just wasn't.  in fact, i pictured the sweetest old granny had made it.

so i gave this old shoe form a new lease on life.

 "before"

and
"after".  i just pulled everything off a tied a little string on. clean and simple.

p.s. this little wooden foot already made an appearance in my japanese tape post.

Thursday, June 2, 2011

laptop case

disclaimer: sorry, the pictures are terrible.

 i made this laptop case for a friend's birthday.  it was pretty easy and really fun to pick fabrics to put together.  
 detail of the stitching and lace
 i was kinda inspired by those envelopes that have the closures with two circles that you wind the string through (do those have a name?) and did the same with buttons.
 these are my signature buttons. i love them
 the front
action shot with the laptop in it.  (it fits i was just showing the laptop going in).  now i need to make one for myself!

tangent:
and i really do need one, i know from experience.  a couple semesters ago i was working in the university preschool. all of the student-teachers had to do a literacy activity where you read the kids a book and then they did an activity that related to the book.  so i read "the very hungry caterpillar" and then we made a lifecycle of a caterpillar on a long strip of paper, starting as an egg...yada yada.  the "chrysalis" stage was a big pasta shell that they glued down.  anyway, i had to make one as a demo, and then i shoved the whole paper in my backpack later on to take home.  the pasta shell cracked into a ton of little pieces and i didn't really think about it to vacuum out my backpack.  a little while later i noticed my disc drive was making really funny noises and then found a piece of that cracked pasta shell in my disc drive! needless to say it's never worked since.  a little laptop case could have saved me the trouble.

gosh, aren't you glad you read that story?

Tuesday, May 31, 2011

my pride and joy

this past fall i was at a nearby antique store with my mom.  on a married student budget, i was not looking for much, maybe a few linens or something small. (that day i did walk out with this old vintage colorblock flag that the owner gave me for FREE! i am saving it for my someday little boy's room)

but then...something caught my eye that kind of made me feel sick:


 i was obsessed. i had seen similar things on ebay and places like 1st dibs for $700-2000, so i automatically assumed it was in the same price range.  i was too scared to find out myself, but i asked my mom to ask the owner (ha ha).  but he quoted her $250.  now, to some of you [camp A], this old cart seems like junk that should be taken to the dump.  but you are wrong.  people like me, [camp B] see this as my kitchen island with a butcher block top, or an amazing shelving unit, or even an entertainment center. and to me, $250 was a steal.

so i went home and talked to my perfect understanding husband [camp A] who helped me find money in our tight budget for this investment.

it sits in our front yard for now, and i smile every time i see it.  we are moving in august to dallas, and it will be one of the few prized possessions we move with.

Monday, May 30, 2011

a wedding present

i am big on these two things lately.  


at the beginning of this year, my brother-in-law got married to a girl from madrid! the wedding was there so all of my husband's family got to go to spain to be there, and it was such a great trip.  i will have to post some pictures when i get around to it.  anway, for my wedding present to them, i thought i'd incorporate both embroidery and maps in a "quilt"--a map felt appropriate since this was an international union.


some of my preliminary planning

i don't pretend to be a quilter.  this is actually more of a pieced blanket.  also, the pictures aren't the best because we had to take them quickly in a cramped spanish apartment while the bride and groom weren't around.


 the breakdown:

i used mostly muslin for the main parts and then pieced some nice thick cotton solids in navy and green. i  filled it with 2 layers of thin cotton batting.  to get it to spain, i put it in a vacuum bag in my suitcase.

i sewed the layers together with a chevron pattern.  it took a bit of measuring but the result was cute.  i bound the edges with a striped seersucker that i love.

also, you can barely see it in the photo above, but in the upper left hand corner of the blanket i embroidered their names and the date.


i embroidered a world map on a separate piece--this is what i worked on for most of the plane ride.  i highly recommend this project for the plane (if you can sneak the needle and tiny scissors past security like i did) because the time went by so fast.  it was relaxing and almost mind numbing.  after i finished, i ironed all the edges and then slipstitched it onto the quilt by hand.

i absolutely love how the embroidered map turned out.  i am definitely going to do this in future projects.
 if you look closely, you can see where i made little x's in both texas and madrid (their homes) and connected them with a little dashed line.  there are also x's where both of them served full-time, 2 year LDS missions (this was long before they met each other). brian's was in ukraine and noemi's was in utah.


and here is the back.

i hope they enjoy it as much as i loved making it!

Monday, May 23, 2011

stork part II

as promised...here is a baby present i made a few months back.  it was so much fun.  my favorite part? cute baby clothes with no character or cutesy saying on it.  i am a little snobby about baby clothes ha ha.
i made a little hoodie, t-shirt, and pants.  they all had the same detailing and striped seersucker accents.
close up of the hoodie

close up of the pants with contrast back pocket.  it was my first time with snap tape, and it turns out it's pretty easy to work with.  i also finished off the hems with the same striped binding so the pant legs can be cuffed and still look cute.
close up of the t-shirt. i just stitched some stripes on for interest.

so there it is.  i love sewing for babies.  i kinda wanted to keep it.  but the mom liked it, so i was happy.

Wednesday, May 4, 2011

botanicals


i am loving botanical prints in homes these days.  they are the perfect mix of
vintage and current, scientific and feminine.. 

for inspiration, i searched "botanical print" in pinterest. here's some of my favorites:

katie's pinterest via

su's pinterest via

via dominomag

maggie's pinterest via

ellen's pinterest via
one of my favorites

michelle's pinterest via
                                                     
pansyeye's pinterest via -- another favorite of mine          


a while ago, i painted my own botanical print for our bedroom
using watercolor, gesso, and ink. i tea dyed the water color paper before painting for an aged look.
 i think that part was key.

i painted an old thrift store frame and sanded it a bit.  i backed my print just on some muslin.  
i quite like how it turned out.


i have some more botanical projects in mind for my bedroom.. 
so hopefully they show up here soon.

Tuesday, March 29, 2011

set sail


lately i've been interested in trying to make bags. 
the problem is that i have so many ideas
 and it is hard for me to focus on just one. 
 me the kick start i've been needing.  
i was inspired by her contact paper screenprinting tutorial 
and used some techniques from it
 [i didn't have all of the right supplies so i kind of had to finagle it]  
during the screenprinting process, which became the pocket pieces.
when i went to hobby lobby to buy screenprinting ink, they didn't
have a navy blue. so i bought a royal blue and mixed it
with some black fabric paint to darken it.  the texture still seemed okay,
especially for a bag.  i probably wouldn't have done 
that if i was doing a t-shirt or other clothing item.
i just picked a geometric looking shape and went with it.

 supplies i used:
about a yard of very thick and stiff natural, unbleached cotton.
a bit of medium heavy-weight cotton for the contrast.
screenprinting ink, contact paper, embroidery hoop
zipper
U-rings

i love this fabric for a bag.  i will definitely use it again.  i put 
it through the wash and i love the permanent wrinkles that
add to the rough aesthetic.  the natural cream fiber and feel of the fabric
reminded me of sailcloth.  combined with the color 
scheme, i thought this bag has a nautical feel. [hence the name]
i also was able to re-use a great industrial looking gray zipper i
took off of something else.

the pros:
i quite like the finished product and the embroidered lettering.
it reminds me vaguely of a mark that might be on a vintage sail,
with this year's date stamp.
i am a screenprinting novice for sure, but i also
like that the rough quality and bleeding around
the edges works well with the fabric/overall aesthetic.
also, i added in some U-rings so i could make a shoulder
strap to go on this bag if i want. 

the cons:    
i should've started simpler!  there were a few construction details 
i was unsure of. i was just kind of sewing on a whim.
i think i will start back at square one, and make a
simple zippered cosmetic bag.  and then build from there.
also, i just saw the contest the other day so i made this up 
really quick this weekend.


anyway, it was a fun little project. thanks for the 
contest and the kick start, lil blue boo!


i have so many other projects i've been 
working on that i need to show... 
hopefully i will get used to posting more often!